Wednesday, November 28, 2012
Scruffy Beard Pattern!
Using US10 needles and worsted weight yarn (I used Stitch Nation Alpaca), cast on 40 stitches.
Knit 3 rows
Row 4: Knit 15, bind off 10, Knit 15
Row 5: Knit 15, cast on 10, Knit 15
Rows 6-12: K2tog, knit to last 2 stitches, SSK each row
Rows 13-15: Knit across
Bind off loosely
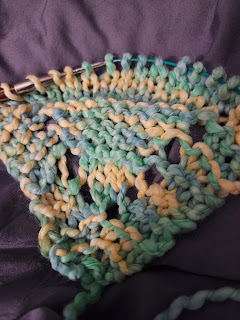
Wrap yarn around palm of hand, then cut your loop so that you have multiple strands of yarn. Starting about 1 inch from the bottom of the beard, sew 5-6 strands of yarn onto beard (I ran a strand of yarn through the beard, place the strands, and then ran the strand through and tied the strands in the back--use whatever method you prefer). Repeat this every 1/2 inch or so along the bottom of the beard. Then, starting about an inch above this row, begin another row of "scruffiness". I staggered my bundles of yarn. I hadn't trimmed anything in the picture shown, but would recommend trimming it to make it look a little less scruffy!
My students at school are literally fighting over these!!
Saturday, September 1, 2012
My first try at dying yarn!
I tried Kool-aid dying tonight on some lion brand fisherman's wool. It was my first time dying yarn, and I was a bit intimidated by the steps and processes of dying with natural ingredients. So, while shopping on www.knitpicks.com, I found the directions for dying with Kool-aid. It was easy, fun, and satisfying! What do you think??? :o)
The pictures show the small hank--approximately 40 yds--before dying, in the mason jar in the microwave during dying, and the beautiful results after dying! Can't wait to knit up the coffee sleeve with this!


Tuesday, August 14, 2012
Most Adorable Baby Hat Ever!!!!
Here is the pattern: http://cyberseams.com/article/105729/all_things_knitting/square_knitted_baby_hat_with_pom_poms.html
And few versions that I've made!!
Monday, July 30, 2012
Tuesday, July 10, 2012
Taking over the world...
Two more knitters created tonight!! I love seeing youngsters knitting! And they BOTH finished great hats tonight!!
Tuesday night knitting...it's catching! See you next week!


Tuesday, July 3, 2012
Pattern by Hanna!
http://instagr.am/p/MUm_VZMtrI/
Using size 10 needles and worsted weight yarn, cast on 150.
Knit 10 rows in garter stitch (knit each row).
Row 1: k10; *p10, k10* repeat until 10 st remain; k10
Row 2: k10; *k10, p10* repeat until 10 st remain; k10
Repeat rows 1 and 2 till desired length. Knit 10 rows in garter stitch, bind off loosely and weave ends!
Progress!
I'm really enjoying the look and feel of making this from Lion Brand Baby's First! Can't wait to finish!

Sunday, July 1, 2012
New boy blankie!
Loved Allegra's cover pattern so much, I'm making it in baby's first cotton. Modifications: size 11 needles, cast on 87, knit 4 @ beg and end of each row instead of 8, knitted 5 rows at beginning too.

Friday, June 29, 2012
Wednesday, June 27, 2012
Tuesday, June 26, 2012
Success! A new knitter is here!
Our first Starbucks knit knite was a hit! Started a new knitter tonight and she's hooked! Caffeinated knitting rocks! Thanks for hosting us every Tuesday, parkway Starbucks!!
Saturday, June 23, 2012
Wednesday, June 20, 2012
Allegra's cover pattern!
emmafassioknitting
For some reason I got an error on the link. This should work!
Blankie progress!
Using vintage yarn from Spain and the beautiful Allegra's cover pattern. Close to the 1/4th mark. I had to take out 4 rows because I got off a bit, but I love it!

New Knitting Group!
Friday, March 2, 2012
Cabled Boot Toppers


Diagonal Stripe Baby Blanket

You will now be starting back at row 1 of the pattern with a knit row. This starts stockinette on a new side.
(c) Ranada Young 2012


